Wednesday, February 24, 2016

I'm Back!

After a very long leave of absence, I'm finally back to start modeling again. To get myself back into the swing of things, I decided to make a weapon. After playing Fallout 4 for a while, I was kind of disappointed with the lack of unique models for some of the weapons. One in particular was the Combat Rifle. It looked almost identical to the Combat Shotgun, with the only differences being the barrel type, the magazine, and the receiver. So I decided to replace the model with something else; the R91 from Fallout 3.


Even though there already is an assault rifle in Fallout 4, I thought it looked more like an LMG rather than an assault rifle. So my plan was to replace the Combat Rifle with the R91 and rename the Assault Rifle to the Light Machine Gun.

As in the vanilla game I plan to have several different mods that can be used with this weapon, such as muzzle brakes, stocks, grips, magazines, and sights, all of which I will model.

After I'm done modeling and texturing the rifle, I will attempt to rig the rifle so that it will work with the vanilla animations (otherwise I'll look for help on the Fallout 4 nexus or something).

Sunday, June 7, 2015

Experimental Week!

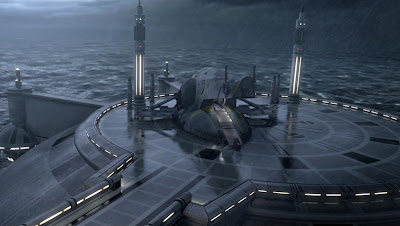
For this week I decided to experiment While I was working on lighting Saedren, I looked at the "landing platform and realized "That's way too small". So I began looking for designs on Google and, of course, found a bunch of Star Wars concept art, like these.


However, I wanted to something a little more "rough" or jagged. I then foumd this image and I thought it was pretty close to what I wanted to make.


So after making a landing platform, I then decided to change the stance that Saedren so that it looked like he was entering a drop ship of some sort. Here's an image. Sorry about  the lighting; it was just a test render to see how it would turn out.


While I do like the idea behind the image, I think that it takes the focus away from the character and puts more emphasis on the enviroment. I will continue to think of different stances for Saedren to be in, but I will keep a copy of this file in case I want to go back and change something.

On a side note, I'm sorry but I did not get a chance to work on the DeLorean this week. However, by next Sunday I should have UVs done and some textures on it.

Sunday, May 31, 2015

Large Sunday Update!

First off, here is an update on the DeLorean. I finally finished UVing the whole exterior of the car, including all of the tubes, wires, and excessories. The tires need a little fine tuning, but other than that the rest is done. Here is all of the UVs on one tile.


Keep in mind this is not the final layout of these UVs. Once I UV the interior of the car, I will then decide the how many UV shells and how much room each UV will get. This will depend on how big that object is or how visible it is. I plan on using 3 to 4 UV shells so I can get a lot of detail onto the car, but I'm hoping to only need 3 (one for the outside, one for the inside, and one for all of the tubes and accessories).

Second, here is more work on Saedren. I'm still working on getting the lighting right, but I just can't find something that I like. It's either too dark or too light, the shadows aren't casting right, or something along those lines. Here are several images of examples of the lighting.


I like this image because of the shadows that are casted from the lights. The glow also adds a nice touch to show the form of him, but I feel like the runway lights are too bright and distract you from the rest of the image.


For this image I tried to brighten it up so you can see more detail, but I just feel like it's too bright and looks very fake. 


For this image I moved the direction of the main light(s) and darkened the shadows, creating more contrast from light to dark. However, this makes things very dark and hard to see any detail. What I would like to do is combine the lights used in both images 1 and 3 to find a happy medium.

I am hoping that by next Sunday I will have the car completely UVd with some textures on it and have the lighting figured out for Saedren as well.

Friday, May 29, 2015

Quick Update!

I will now be updating this blog (and hopefully my other blog) every Sunday, starting May 31. Since Sunday is the end of the week for me, I feel like I should post updates at the end of every week instead of a few days before the end of the week. So expect to see new stuff up this Sunday for both blogs (I finally have my printer set up so I can scan my sketches and upload them). Hope you guys continue to stop by to see what I'm working on!

Friday, May 22, 2015

Back to Saedren

Here's more work on Saedren. I added more detail to him, made his cape "flowing", and changed the lighting and background a little. Before I start redoing the textures, there are several things that still need tweaking (i.e. the lighting, more background detail, etc). Once those things are done I will start retexturing everything. Here's my progress.


I am also still working on the UVs for my DeLorean, so expect an update on that next Friday.

Monday, May 11, 2015

Quick Update - UVing

Right now I'm in the process of UVing the car. Here is a sample of what I'm working on.


Don't worry I won't give a whole UV shell to the door. I just wanted to blow it up to show you how the UVs look. Hopefully I'll be done UVing by the end of this week, but I still have to complete some work for my internship. So we'll see.

Saturday, May 9, 2015

Week 16 - Almost Done! (with modeling)

As the title suggests, I am almost done with all of the modeling. The tri-count is a little higher than I want it to be, so I'm going to see how many edge loops I can delete from the tubes without effecting the shape of them. Here is what I have so far.


Once I lower the tri-count as much as possible, I will then UV and texture it.